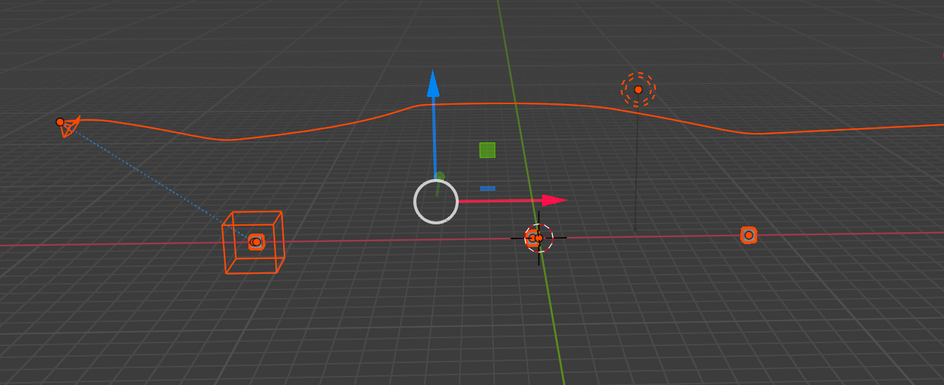
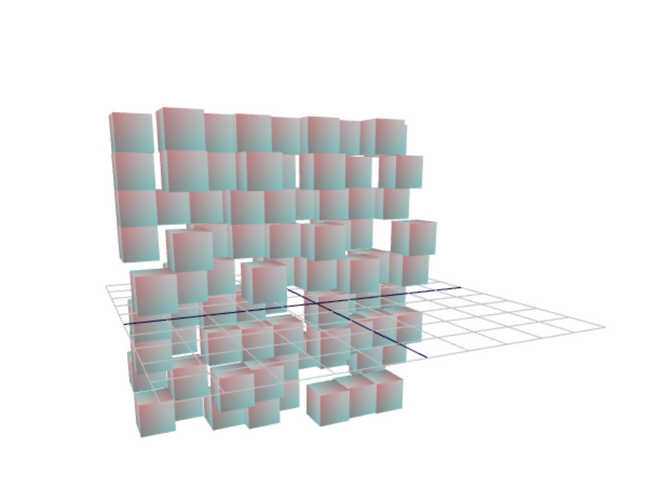
This is a short write up of the latest experiment, which was to animate a camera in blender, export it to a gltf file, use gltf to jsx npm module and load the animation into a react three fiber project.
Here is an example of the camera path in action:
So my exact setup for blender is to use steam, easy for updating blender 😄
First off place 3 cubes in a row along the x axis. Shift-a to get up the menu to place meshes and other items, or just cmd+c/cmd+v and do this twice.
Click on a cube and use the transform tool on the left hand side of the screen. Make sure you are in object mode (there will be a menu drop down on the upper left screen). So now you should have a row of cubes:
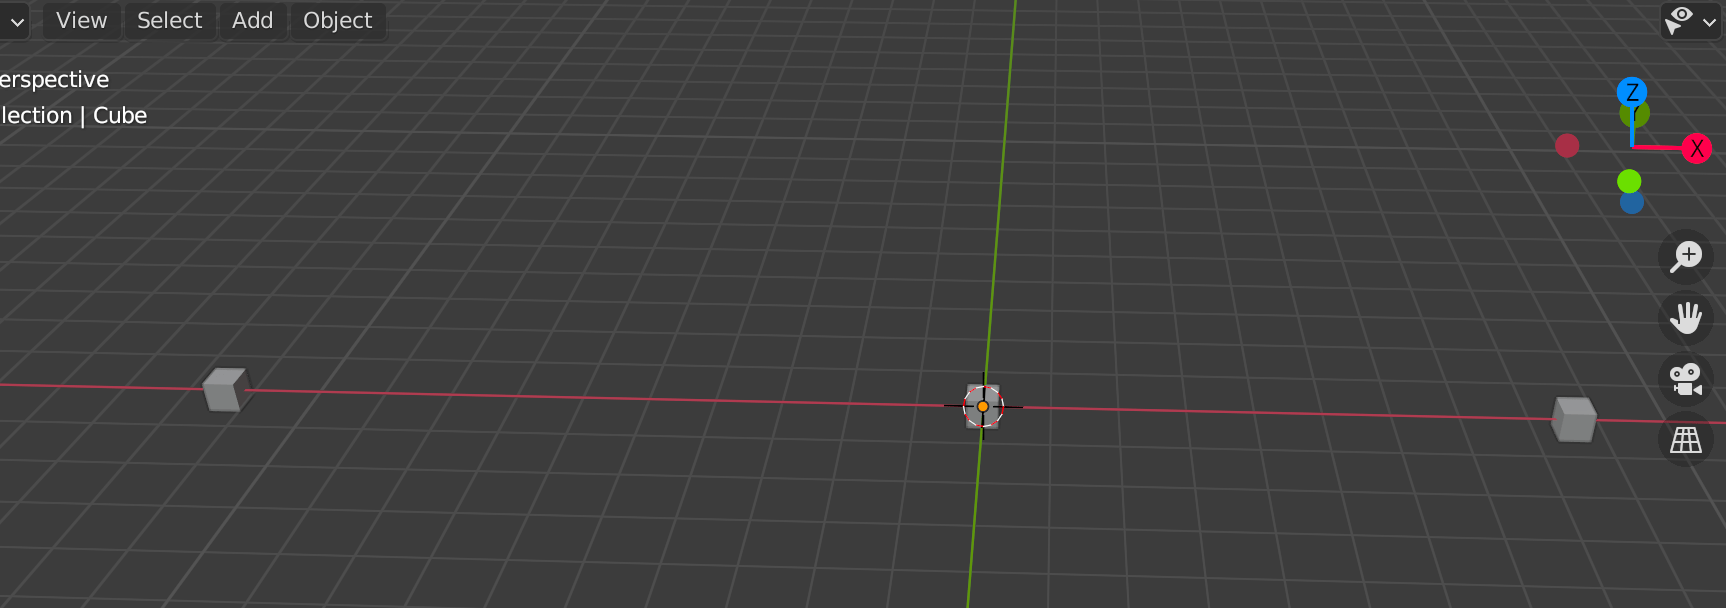
Now all we want to do is get a camera to follow a path and change the lookAt of the camera as it follows a path. To begin with, create a bezier curve which navigates around the cubes:
Then we need an empty with a child of the camera. Shitf+a and select empty and cube, then an empty cube will be created at the origin. Click on the camera and Option+g to center the camera at 0,0,0.
Now be careful and select the camera first and then the empty we just created. Right click and click the parent option.
Click on the empty cube and add a follow path constraint in the constraints tab. The constraint tab will look like this:
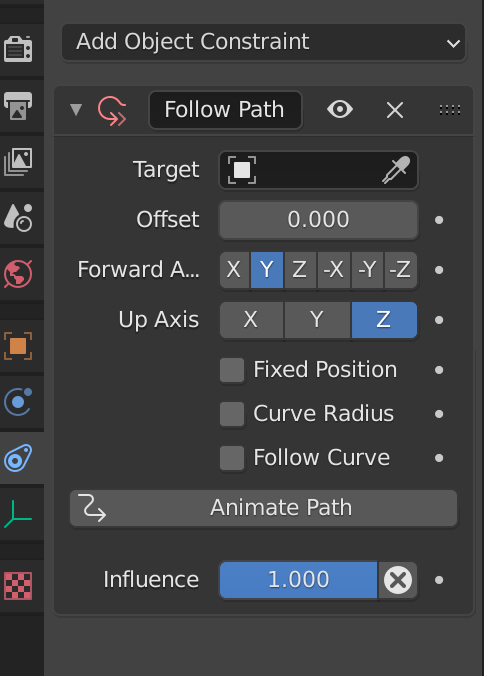
Set the target to be the bezier curve. Select -Z as the forward axis and Y as the up axis. (I just found this out via some ace blender tutorials..)
Fixed position and follow curve should be checked. Now we should have an empty at the start of the path and the camera moving with it!
The offset of the follow path constraint is 0 (start) and 1.0 (end).
Now we need something to use as lookAt for the camera, so go ahead and create another empty, this will be the lookAt constraints target.
With the camera selected, now add another constraint, the track to constraint. As the target for this constraint select the second empty:
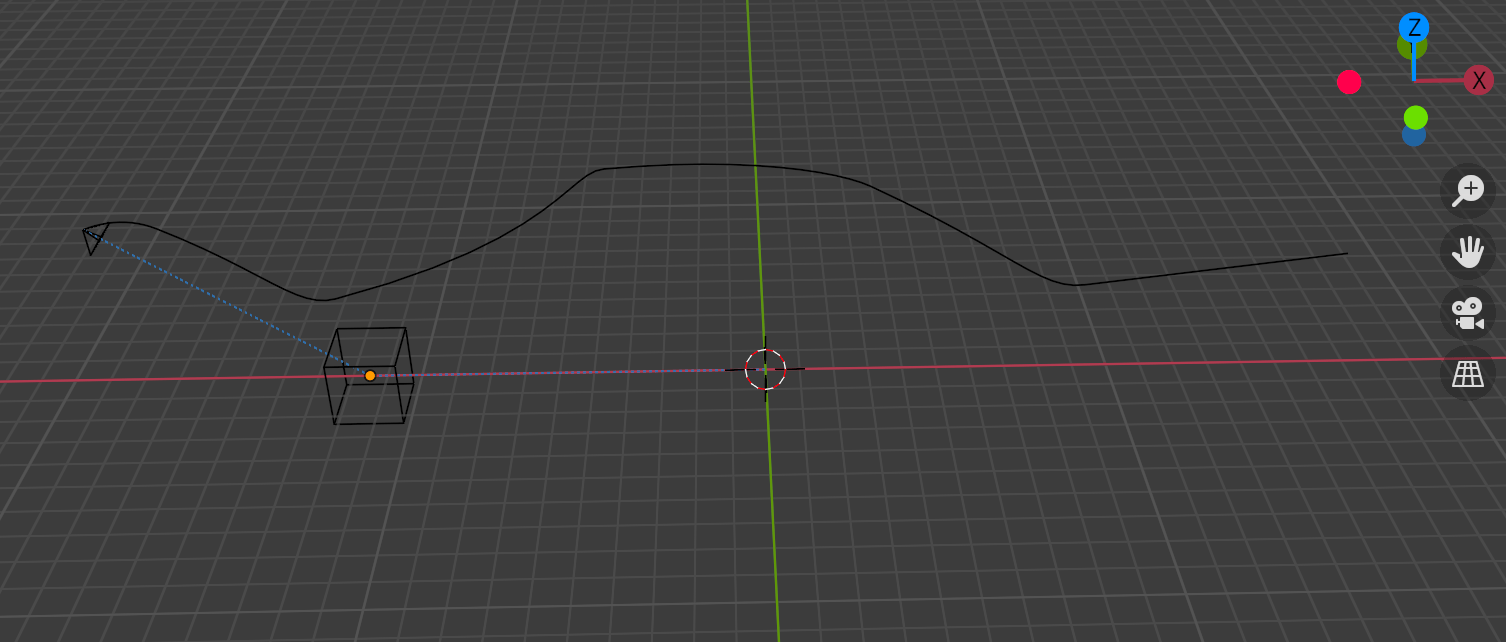
We are now ready to key frame.
In this scenario key-framing works by storing either a piece of positional or rotational data. Then move the current frame in the time line forward and set the new key frames.
A few tips when key framing:
Press N in blender to get the position tab open
Hold and click the bottom bar to get the key frame time line up.
After key framing both position and rotation move the current frame forward so from 0 to 40.
Before setting a key frame do control+a and apply all transforms. This updates what you see in the position tab, and then key frame it. (28/08/2021 - EDIT: To the empty which is parented to the camera)
Don’t forget to key frame the lookAt empty object as well, otherwise it won’t work
The one thing to remember is we are not exporting empties or constraints or anything like that. We are exporting key framed position and rotation of the camera.
Once you have everything key framed, press this button:
And press the space bar to start the animation. This will show you what the camera is viewing.
One side note - you might need to adjust the fov of the camera as when it’s too little, it will have a very narrow view and too much will result in a very wide view. You can change it by selecting the cube in front of the camera and dragging it forward or backward.
Once you are 100% happy with the scene, save it to a .blend file and then select the camera and bake the animation (28/08/2021 - EDIT: click all the options on the bake menu but the top one):
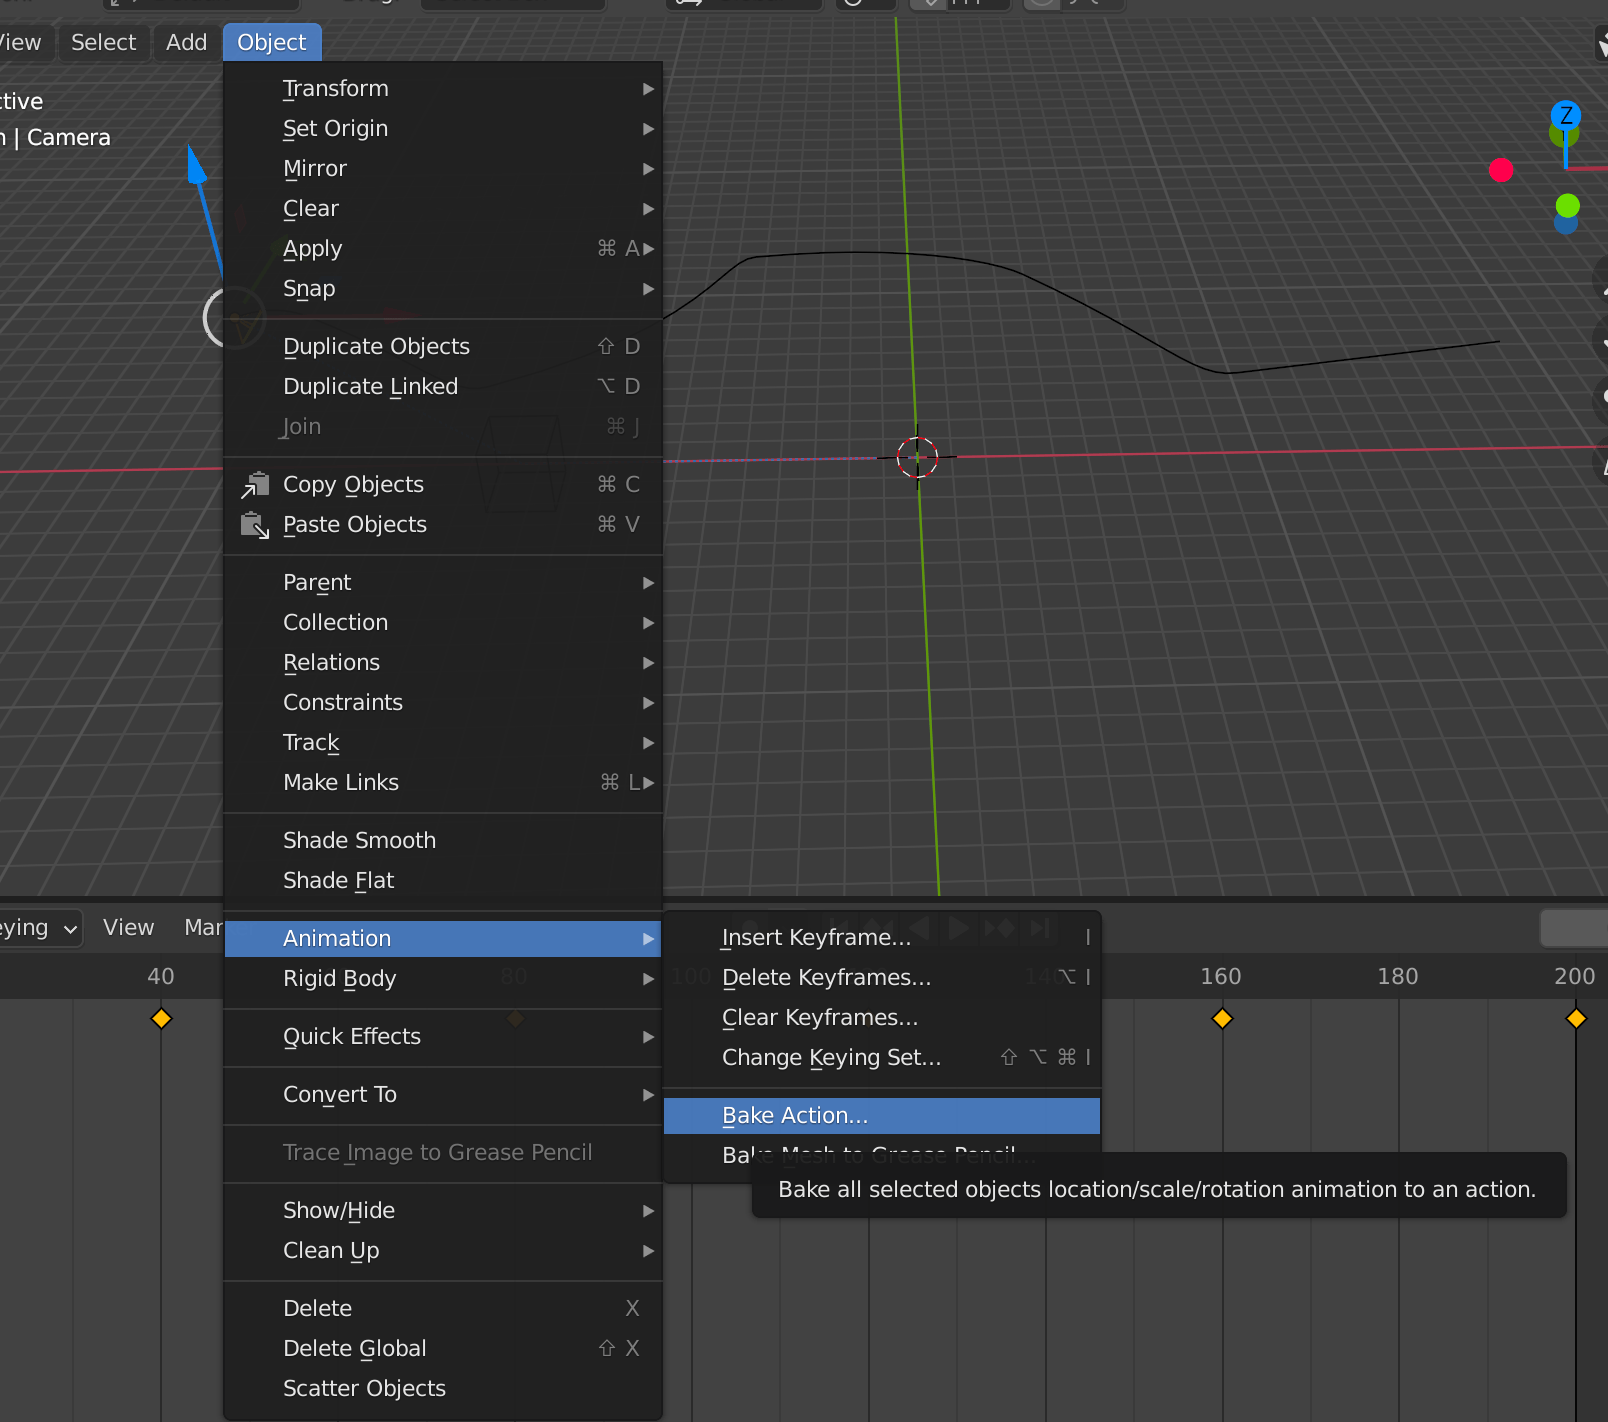
We do this because if we export to gltf and the export camera option is checked, and then re-import the gltf into blender (as a sanity check) the animation is all messed up, due to a known issue exporting curves to gltf format. So we bake it and remove the curve.
Without baking:
With baking:
This gltf file exported from blender was viewed in this online gltf viewer. This is a really handy tool for checking your model out, and it can show you camera animations as well.
Here is an example of the JavaScript file which will load the animation, I used gltfjsx to produce a jsx file of the scene (dont forget to use the -v -a flags when using npx gltfjsx commands):
1// /*2// Auto-generated by: https://github.com/pmndrs/gltfjsx3// */45import React, { useEffect, useRef } from 'react'6import { useGLTF, PerspectiveCamera, useAnimations } from '@react-three/drei'7import { useThree, useFrame } from 'react-three-fiber';89export default function Model(props) {10 // const group = useRef()11 // const { camera } = useThree();12 const group = useRef()13 const { nodes, materials, animations } = useGLTF('/Final-cam--21-11.glb')14 const { actions } = useAnimations(animations, group)1516 useEffect(() => {17 actions['CameraAction.003'].play()18 }, [])19 return (20 <group ref={group} {...props} dispose={null}>21 <group name="Scene">22 <group name="Light" position={[4.08, 5.9, -1.01]} rotation={[1.89, 0.88, -2.05]} />23 <group name="BezierCurve" position={[-0.97, 0, 3.44]} />2425 <group name="Camera" position={[-0.64, 3.17, 48.6]} rotation={[0.89, -0.05, 0.06]}>26 <group name="Camera_Orientation">27 <group name="Camera_Orientation_Orientation">28 <PerspectiveCamera29 name="Camera_Orientation_Orientation_Orientation"30 makeDefault={true}31 far={1000}32 near={0.1}33 fov={70.1}34 rotation={[-Math.PI / 2, 0, 0]}35 />36 </group>37 </group>38 </group>3940 <mesh41 name="Cube"42 geometry={nodes.Cube.geometry}43 material={materials['Material.001']}44 position={[-0.94, 0.66, -8.69]}45 scale={[0.49, 0.49, 0.49]}46 />47 <mesh48 name="Cube001"49 geometry={nodes.Cube001.geometry}50 material={materials['Material.002']}51 position={[-0.02, -0.19, 13.53]}52 scale={[-0.55, -0.55, -0.55]}53 />54 <mesh55 name="Cube002"56 geometry={nodes.Cube002.geometry}57 material={materials['Material.003']}58 position={[-0.97, 0, 3.44]}59 scale={[0.56, 0.56, 0.56]}60 />61 </group>62 </group>63 )64}6566useGLTF.preload('/cam-4.glb')
The more trickier task from my experience… is switching between cameras without artifacts. But believe me this is possible, just a little tricky. It’s a matter of copying rotational and positional data from one camera to the next! I make it sound so easy 😭😀
Final Thoughts:
So we have animated a camera path in blender, why would this be useful?
You could have a cinematic camera path for an opening scene to a 3D map (a bit like Deptfest virtual weekender - my companies event) or you’ve created a neat website where you attach the animation to a scroll event and navigate through 3D space.
There are quite a lot of reasons why you would want this sort of animation and now you can use the blender to three/R3F work flow.
Really hope you liked this write up of my experiences.
Stay safe and if you want to contact me, go via LinkedIn 🙂

