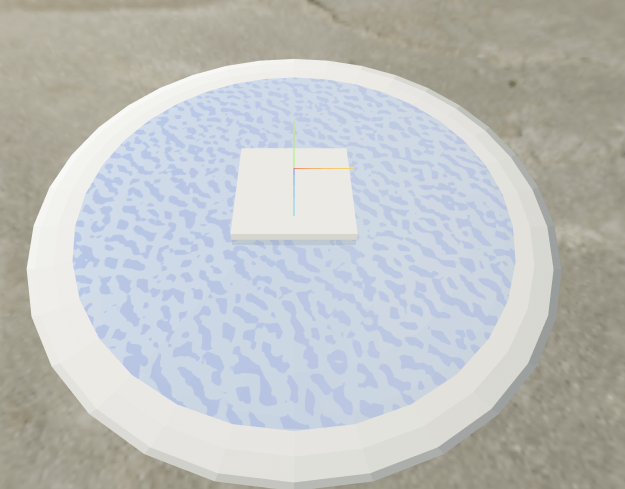
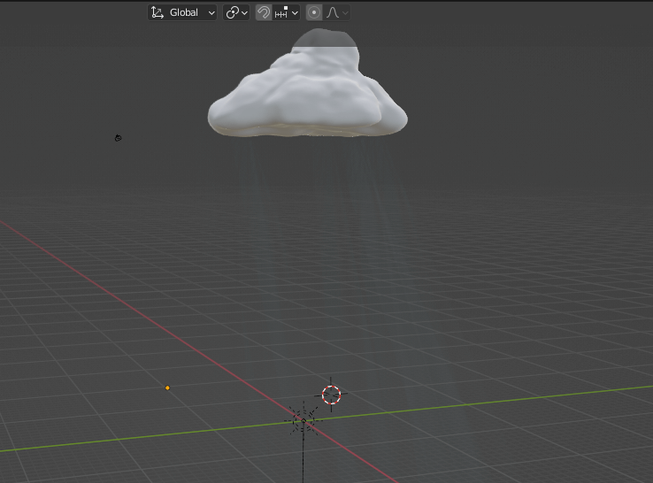
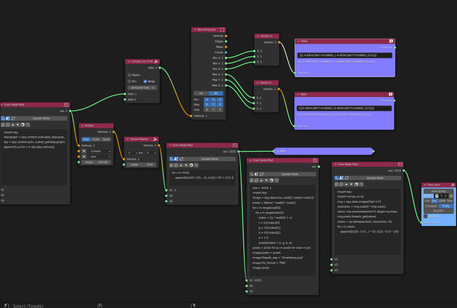
So I initially wanted to investigate how to do vertex displacement and pass an array of mouse intersections with a plane to a custom shader. 💧💧💧
This then lead me to investigate onBeforeCompile and how to integrate my custom shader with a built in threejs material leveraging lighing and all the features of built in materials.
The general flow is as follows:
Create a basic model for testing
Export hdri for use in r3f project
Capture intersections with Plane
Create a custom shader (very basic premise)
- Generate ripples algorithm at points of intersection
- Sum these ripples so it looks more realistic
- Decrease ripples with time and distance
Integrate with a built in material - onBeforeCompile
Update built in uniforms with useFrame
1// Inspiration and useful guides:2//https://forum.unity.com/threads/re-map-a-number-from-one-range-to-another.119437/3//https://gist.github.com/yiwenl/3f804e80d0930e34a0b33359259b556c4// https://tympanus.net/codrops/2019/10/08/creating-a-water-like-distortion-effect-with-three-js/5// https://john-wigg.dev/DynamicWaterDemo/6// https://www.shadertoy.com/view/4dVcWR7//https://spectrum.chat/react-three-fiber/general/onbeforecompile-and-updating-uniforms~fd2d6306-11bd-4e9d-b323-e17f89ea99ec8import React, { useRef, useEffect, useCallback, useMemo } from "react";9import { useGLTF } from "@react-three/drei";10import { useFrame } from "@react-three/fiber";11import * as THREE from "three";12import "./styles.css";1314let position = Array(100)15 .fill(1)16 .map((item) => ({17 origin: new THREE.Vector3(0, 0, 0),18 radius: 1019 }));20let formattedPosition = position.map(({ origin }) => origin);21let radi = position.map(({ radius }) => radius);2223const customShader = {24 uniforms: {25 time: {26 value: 027 },28 positions: {29 value: formattedPosition30 },31 len: {32 value: 133 },34 radi: {35 value: radi36 },37 resolution: {38 value: new THREE.Vector2()39 }40 },41 vertexShader: {42 top: `43 #define STANDARD44 uniform float time;45 uniform vec3 positions[100];46 uniform int radi[100];4748 float Remap (float value, float from1, float to1, float from2, float to2) {49 return (value - from1) / (to1 - from1) * (to2 - from2) + from2;50 }51 `,5253 bottom: `54 float sum = 0.0;55 float velocity = 10.0;56 float total = 200.0;5758 // We loop over the mouse intersections creating the59 // cumulative displacement to make look more natural.6061 for (int i = 0; i< 100;i++) {62 // Due to glsl not really allowing dynamic arrays63 // we pass a fixed length array with starting intersections64 // of 100 vec3(0.0, 0.0, 0.0).6566 if (positions[i].x != 0.0) {6768 // Calculate the diameter of the ripple using the decreasing radius69 // Mapping to 0.0 - 0.8. This means the larger the radius the smaller70 // the ripple, which is inline with a real water ripple.. ripples get larger.7172 float diameter = 1.0 + Remap(float(radi[i]),total, 0.0, 0.0, 0.8);7374 // The larger the index i gets the larger the value75 // which means the larger the diameter. So the older the76 // mouse intersection with the plane the larger the diameter77 // will be.7879 float newRange = Remap(float(i), 0.0,100.0, 0.0, .80);8081 // Comparison is what controls the diameter of the ripple, which increases82 // over time.8384 float radiatingWidth = pow((diameter + newRange ), 2.0);8586 // This is used to decrease the ripple back to zero87 float decreaseRipple = 1.0 + Remap(float(radi[i]),total, 0.0, .80, -.70);8889 // Wave strength90 float wave = 10.0;9192 // Array of mouse positions (100) that intersect the plane93 vec3 mouse = positions[i].xyz;9495 // Caculate the distance for each intersection from the current96 // vertex position to the mouse intersection. Allowing us to create a sin97 // wave from a specific point.9899 float distanceToRipple =distance(position, mouse);100101 // What size is the ripple? Is the distance to the ripple102 // within the bounds of the width of the ripple, if so we103 // calculate the displacement of the y coordinate.104 if (distanceToRipple < radiatingWidth) {105 // Calculate the actual ripple or displacement106 float ripple = cos(sin(distanceToRipple * wave - time * velocity));107108 // we want to decrease the strength of the wave over time and therefore109 // the ripple strength110 wave -= decreaseRipple;111112 // Sum the ripples, all 100 of them. And decrease over time113 // to diseminate the ripple114 sum += ripple * decreaseRipple;115116 // When we get to 0 by decreasing the sum of ripples and117 // the strength of a ripple, we set to 0. So we add nothing118 // to the original position119 if (sum < 0.0) {120 sum =0.0;121 }122 if (wave < 0.0) {123 wave = 0.0;124 }125 }126 }127 }128129 // Add the overall displacement sum (tuning with a division)130 // to the Y of the current vertex position131 float y = position.y + sum/200.0;132133 // And finally the usual matrix multiplications134 vec4 modelView = modelViewMatrix * vec4( position.x, y, position.z, 1.0);135 gl_Position = projectionMatrix *modelView;136 `137 }138};139140// START OF COMPONENT141export const WaterPlane = () => {142 const increment = 1.0;143 const { nodes, materials } = useGLTF("/water-ripples-1.7.glb");144 const ref = useRef();145146 useEffect(() => {147 setInterval(calc, 10);148 }, []);149150 const OBC = useCallback((shader) => {151 console.log({ shader });152 // setShaderRef(shader);153 shader.uniforms = { ...shader.uniforms, ...customShader.uniforms };154155 shader.vertexShader = shader.vertexShader.replace(156 "#define STANDARD",157 customShader.vertexShader.top158 );159 shader.vertexShader = shader.vertexShader.replace(160 `#include <fog_vertex>`,161 customShader.vertexShader.bottom162 );163 }, []);164165 function calc() {166 const updated = position.map(({ origin, radius }, index) => {167 if (radius === 10) {168 return { origin, radius: 0 };169 }170 return { origin, radius: radius - increment };171 });172173 position = updated.slice(0, 100);174 formattedPosition = position.map(({ origin }) => origin);175 radi = position.map(({ radius }, index) => radius);176 }177178 const material = useMemo(() => {179 const m = new THREE.MeshStandardMaterial();180 m.onBeforeCompile = OBC; // Modifies the shader181 return m;182 }, [OBC]);183184 useFrame(({ gl, clock }) => {185 customShader.uniforms.time.value = clock.timeElapsed;186 customShader.uniforms.positions.value = formattedPosition;187 customShader.uniforms.radi.value = radi;188 });189190 return (191 <>192 <group dispose={null} ref={ref}>193 <mesh194 geometry={nodes.Sphere.geometry}195 material={nodes.Sphere.material}196 />197 <mesh geometry={nodes.Cube.geometry} material={nodes.Cube.material} />198 <mesh199 rotation={[0, 0, 0]}200 geometry={nodes.Plane002.geometry}201 material={materials["Material.001"]}202 onPointerMove={(e) => {203 if (position.length === 100) {204 position.unshift({205 origin: e.intersections[0].point,206 radius: 200.0207 });208 }209 }}210 >211 <primitive212 attach="material"213 object={material}214 {...materials["Material.001"]}215 />216 </mesh>217 </group>218 </>219 );220};
Create a basic model for testing
The model I made is very similar to others i make for testing, it involves a UV sphere. Scaling it first and then in edit mode we click the +z axis on the gizmo and look top down. Then select the top vertices, scale and translate.
This provides abit of a cup for the plane to sit, which will represent the water.
Here is the basic model I created:
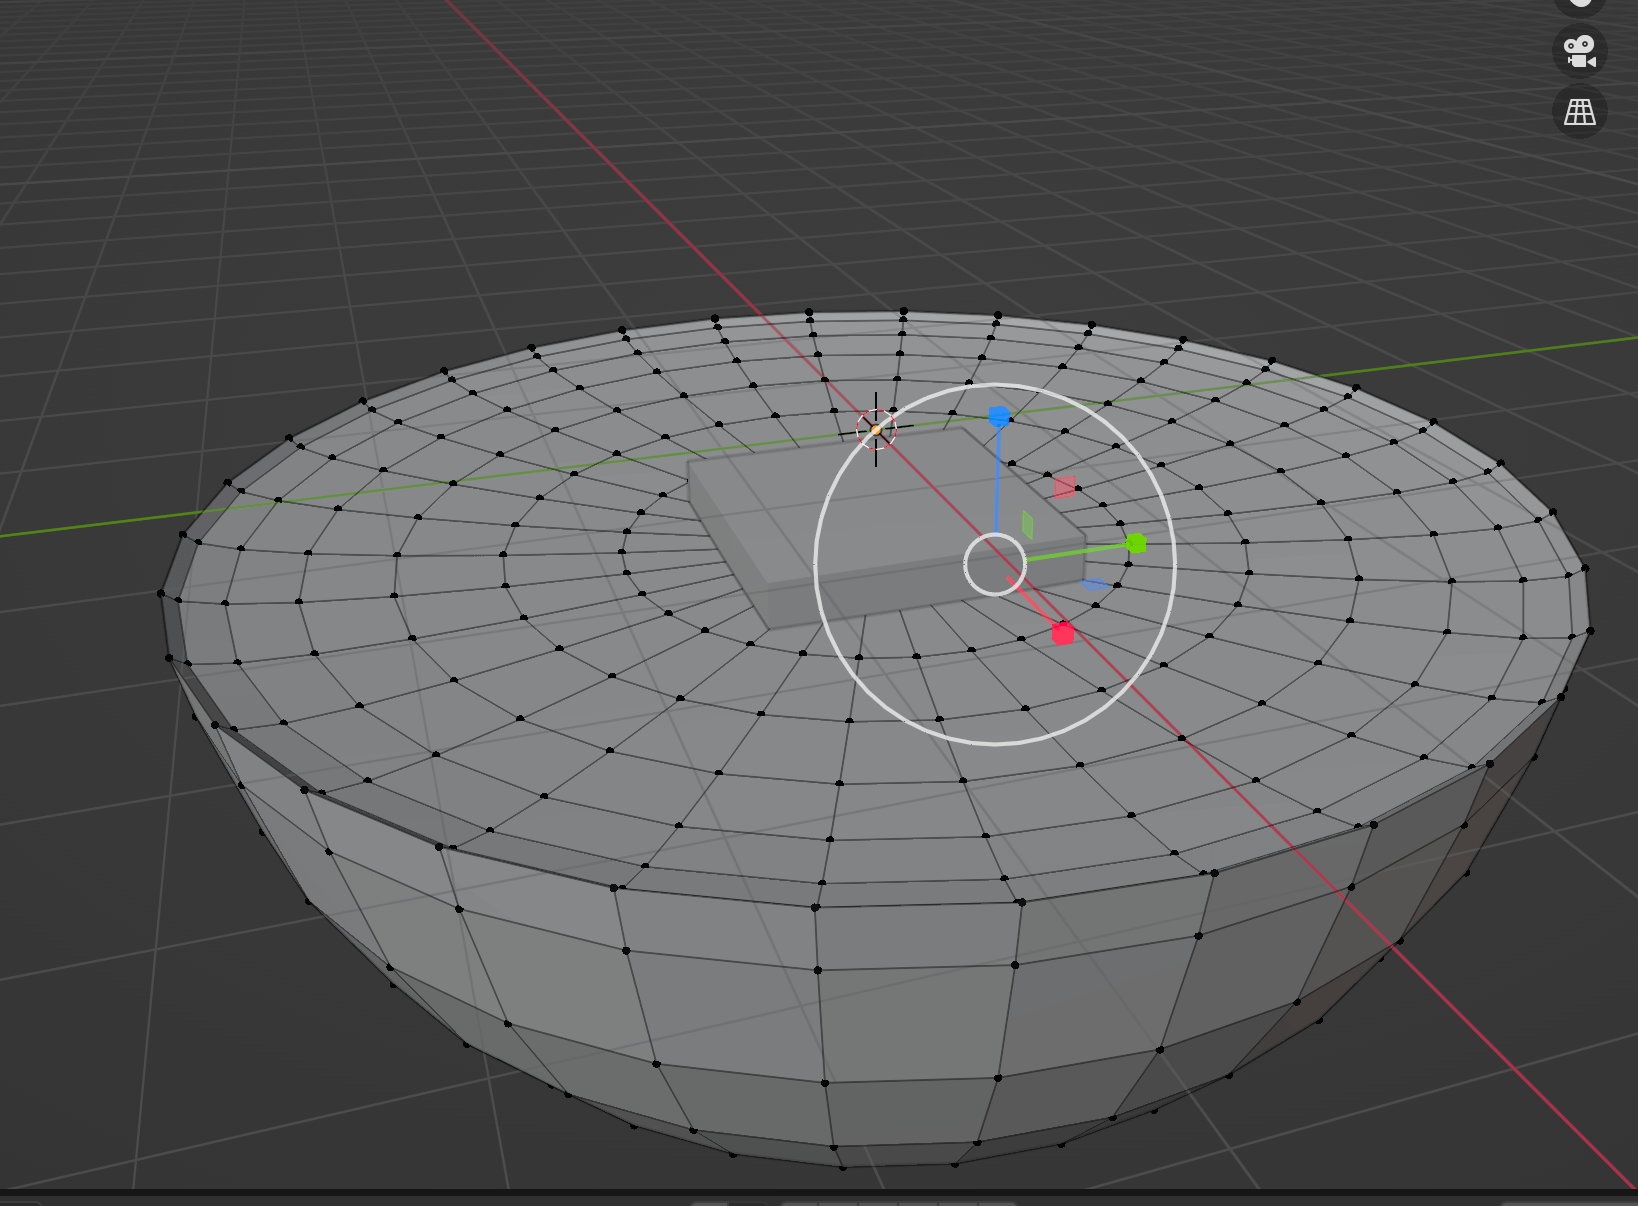
I also whacked a cube in there for a point of reference.
Next we create a plane subdivide it until we get quite alot of verticies on the plane.
Move the plane down so it covers and intersects the outside of the custom UV sphere we made.
Use a boolean modifier with difference selected. We then apply the modifier.
Spilt the plane by loose parts, delete the outer loose bit and keep the middle bit which should now look like a circle type shape.
⚠️ N.B. Two points on vertices
- If we dont have enough subdivides the vertices wont be uniform and evenly spreadout and when we displace them in the shader the movement will look clucky
- If we dont have enough verticies no matter how strong the displacement, it will look like a very flat wave or ripple
⚠️ Before we export we need to crt + a and apply all transformations
We can and will export this to gltf and use gltfjsx with this command to get jsx output:
1npx gltfjsx <modelName> -p 10
The output should look something like this:
1/*2Auto-generated by: https://github.com/pmndrs/gltfjsx3*/45import React, { useRef } from 'react'6import { useGLTF } from '@react-three/drei'78export function Model(props) {9 const { nodes, materials } = useGLTF('/water-ripples-1.5.glb')10 return (11 <group {...props} dispose={null}>12 <mesh geometry={nodes.Sphere.geometry} material={nodes.Sphere.material} />13 <mesh geometry={nodes.Cube.geometry} material={nodes.Cube.material} />14 <mesh geometry={nodes.Plane002.geometry} material={materials['Material.001']} />15 </group>16 )17}1819useGLTF.preload('/water-ripples-1.5.glb')
Right, now we have the model I simply gave the uv sphere base a light colour in the shading tab and followed this article to get some semi decent looking water / normal map.
Now we can move to the next step!
Export hdri for use in r3f project
So I have a really cool addon for hdri’s, hdri maker blender addon. The really cool thing is you can either use some pretty good presets or create a shader texture for world background and then render a panoramic shot of the shaded texture and export as a hdri!
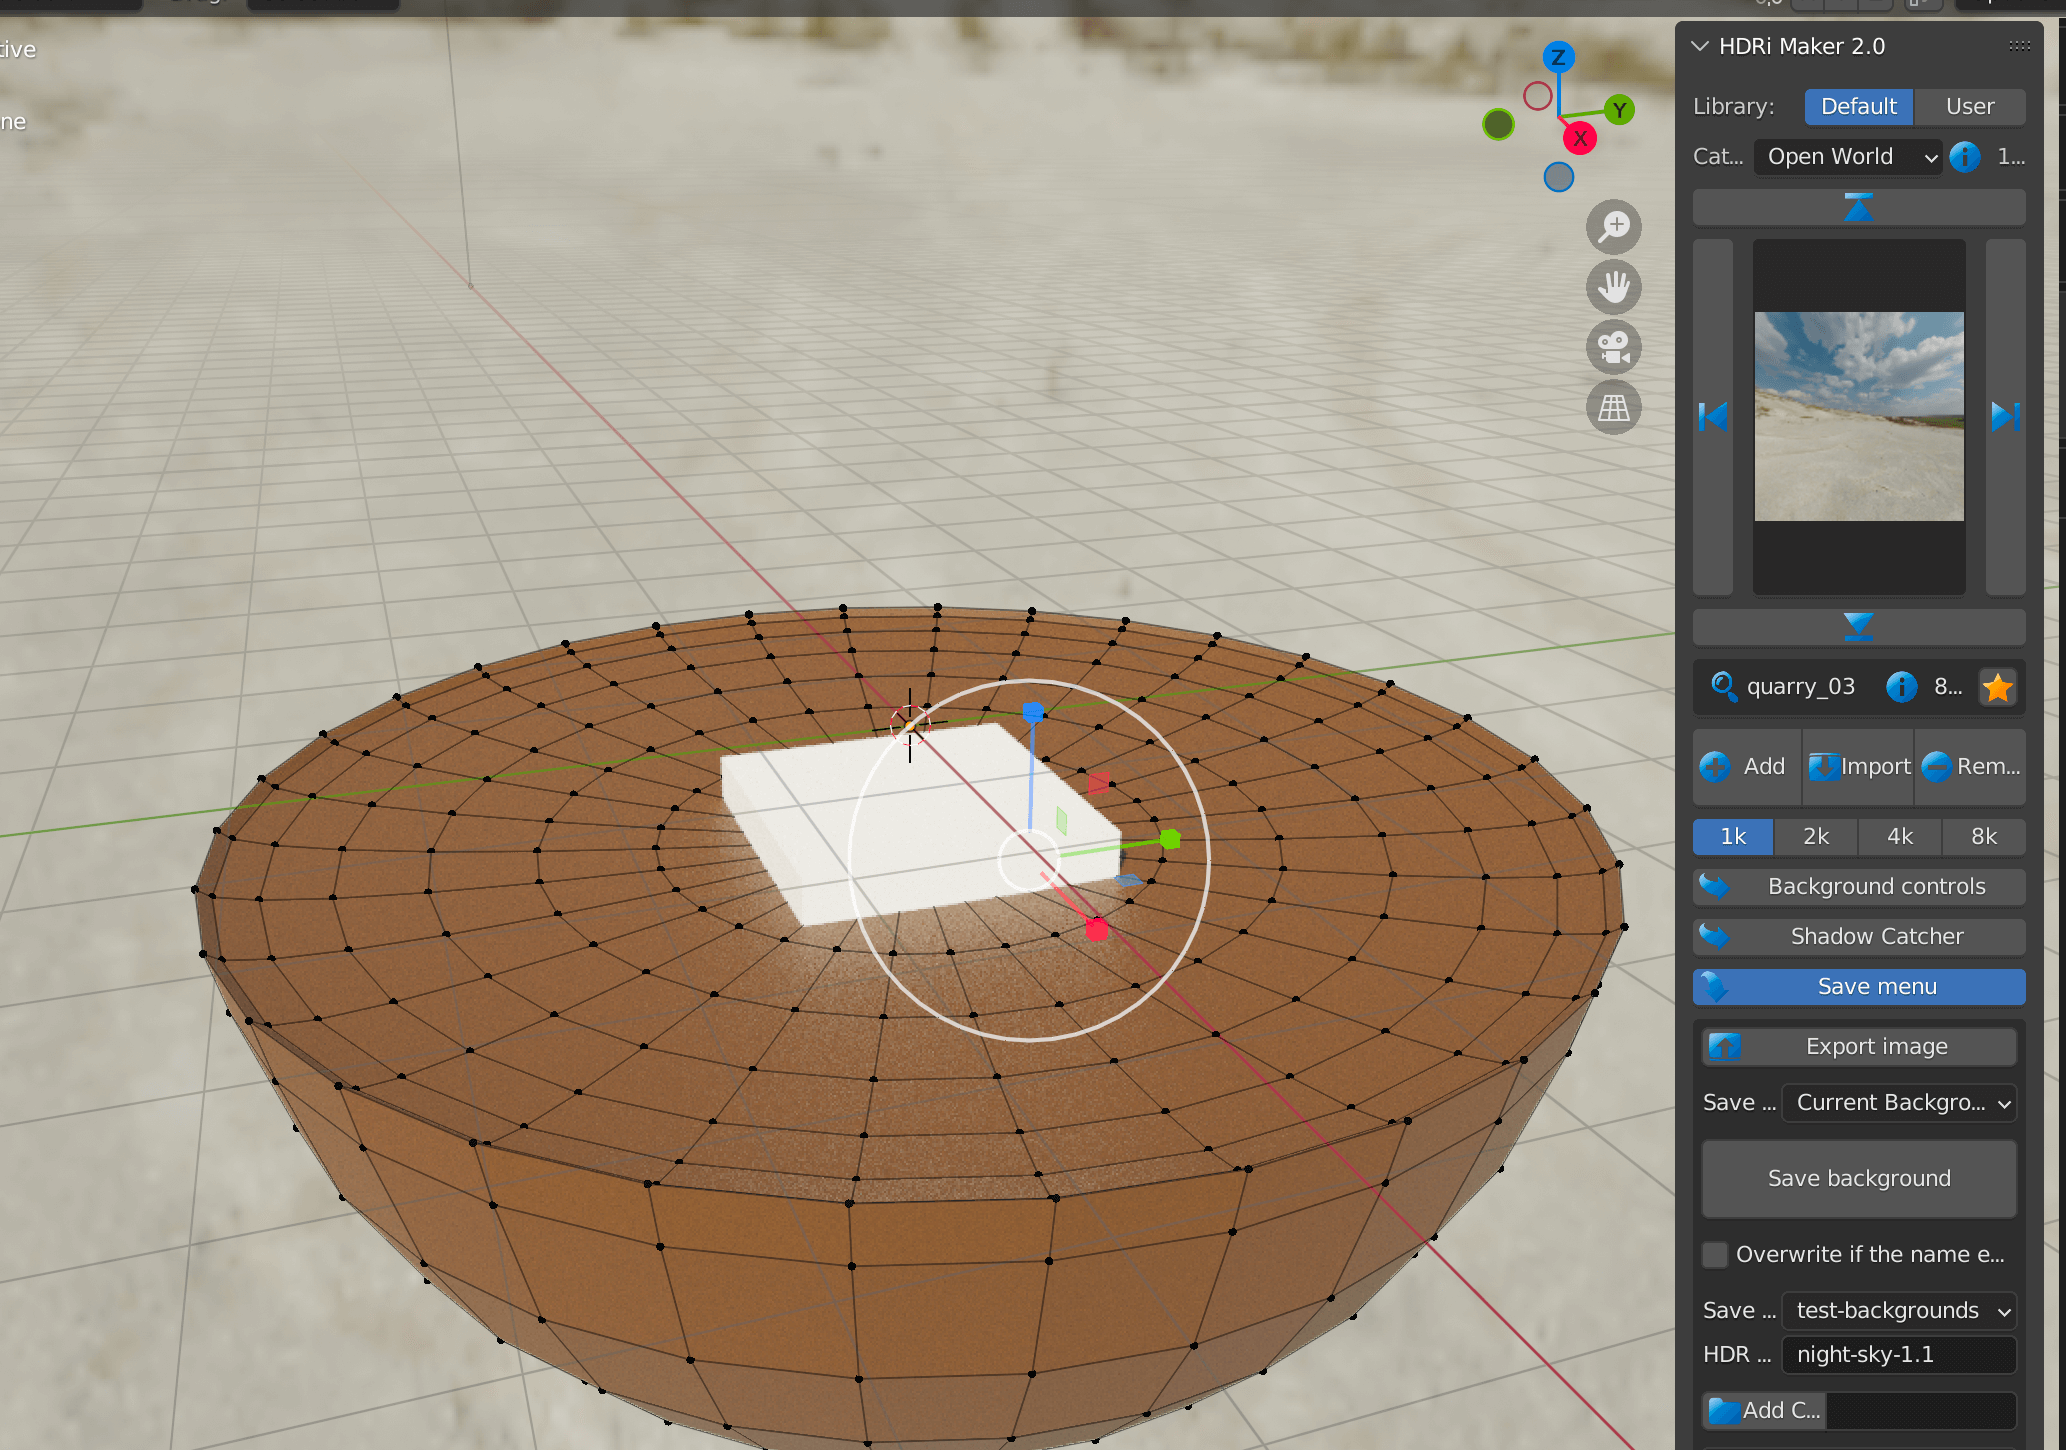
You can export the present or save/render/export your own background as a hdri.
⚠️ Baring in mind hdri’s are light emitting, so the darker the scene the darker the objects in the scene. Dont forget to tweak the tone mapping and toneMapping exposure if you want to modify the intensity. Heres how you can do that:
1<Canvas2 camera={{ position: [0, 5, 5] }}3 onCreated={({ gl }) => {4 gl.toneMappingExposure = 1.6;5 // gl.physicallyCorrectLights = true;6 gl.outputEncoding = "CineonToneMapping";7 }}8>
You can then use Drei’s environment to load up the hdr.
1<Environment2 background={true}3 files={"water-ripples-1.3.hdr"}4 path={"/"}5/>
The background prop just tells r3f if you want the hdr as a background aswell. File name goes in files and then the path is just ’/’ which will be in the public folder.
So with our model and hdri done we can now focus on the shader and interaction.
Capture intersections with Plane
First of if we want some kind of interaction with the plane then we are going to have to capture this.
Luckly with R3F, we have access to certain event listeners which accept a callback to run when the event is fired. Below shows what i have done:
1<mesh2 rotation={[0, 0, 0]}3 geometry={nodes.Plane002.geometry}4 material={materials["Material.001"]}5 onPointerMove={(e) => {6 if (position.length === 100) {7 position.unshift({8 origin: e.intersections[0].point,9 radius: 200.010 });11 }12 }}13>14 <primitive15 attach="material"16 object={material}17 {...materials["Material.001"]}18 />19</mesh>
This isnt mobile optimised but I use onPointerMove to add a intersection to the start of the positions array.
⚠️⚠️ A very important factor in why I setup an array initially with 100 origins and radi is because I couldnt get a workaround for dynamic arrays to work in glsl. As you have to define the length of the array. I know you can use #define and do the string repacement like so:
1const shader = `2#define int length 10034uniform vec3 positions[length]5`6 // change the define78useEffect(() => {9 shader.replace('100', dynamicLength)10}, [dynamicLength])
But I just couldnt get this to work, so like the pragmatist I am, I decided plan B and create a initialized bus, older events === greater index in the array:
1// Not using react state as we dont need to if all where we are2// using these variables is in useFrame.. + react couldnt handle3// these fast updates4let position = Array(100)5 .fill(1)6 .map((item) => ({7 origin: new THREE.Vector3(0, 0, 0),8 radius: 109 }));10let formattedPosition = position.map(({ origin }) => origin);11let radi = position.map(({ radius }) => radius);
The origin is where we will emenate the ripple from and the radius is like a modulator so the older added ripples will have a different radius to the ones just added. This is super important as we need something to say whats newer and whats older:
- older ripples = bigger
- newer ripples = smaller
So we caputure the ripples or intersections via onPointerMove and we initialize the starting data. But how do we update this data, well heres my setup:
1const increment = 10;2// setting interval every 10ms3useEffect(() => {4 setInterval(calc, 10);5}, []);67// Calculation function8function calc() {9 // Map over the position / intersection array to update10 const updated = position.map(({ origin, radius }, index) => {11 // and set radius to equal zero if the current radius is zero12 // so we dont get a negative radius13 if (radius === 0) {14 return { origin, radius: 0 };15 }1617 // Otherwise we decrease the radius and return it.18 return { origin, radius: radius - increment };19 });2021 // We only want a 100 items in the array as glsl cant handle dynamic arrays22 // or I couldn't figure it out23 position = updated.slice(0, 100);2425 // Generate formatted data for passing to uniforms26 formattedPosition = position.map(({ origin }) => origin);27 radi = position.map(({ radius }, index) => radius);28}
So we have a way of passing data to the shader but how do we construct the algorithm to actually do the ripples.
Create a custom shader
This was the hardest bit for me as Im still getting used to glsl 2 years on 😅
So we need to:
- Consume the intersections of the event handler in a uniform
- Loop over these positions
- Filter out the intial base vector data
- Create some modulators to add to the displacement of the current position y coordinate
- Is the distance from the current position/vertex less than the radiating width of the ripple? If so we want to allow us to displace and calculate the ripples displacement
- Cumulate or add up the total effect on the current position’s y coordinate
- Do the usual Matrix multiplications
1float loop = 28.0;2 float sum = 0.0;3 float velocity = 10.0;4 float raio = 1.0;5 float total = 200.0;67 // We loop over the mouse intersections creating the8 // cumulative displacement to make look more natural.910 for (int i = 0; i< 100;i++) {1112 // Due to glsl not really allowing dynamic arrays13 // we pass a fixed length array with starting intersections14 // of 100 vec3(0.0, 0.0, 0.0).1516 if (positions[i].x != 0.0) {1718 // Calculate the diameter of the ripple using the decreasing radius19 // Mapping to 0.0 - 0.8. This means the larger the radius the smaller20 // the ripple, which is inline with a real water ripple.. ripples get larger.2122 float diameter = 1.0 + Remap(float(radi[i]),total, 0.0, 0.0, 0.8);2324 // The larger the index i gets the larger the value25 // which means the larger the diameter. So the older the26 // mouse intersection with the plane the larger the diameter27 // will be.2829 float newRange = Remap(float(i), 0.0,100.0, 0.0, .80);3031 // Comparison is what controls the diameter of the ripple, which increases32 // over time.3334 float radiatingWidth = pow((diameter + newRange ), 2.0);3536 // This is used to decrease the ripple back to zero37 float decreaseRipple = 1.0 + Remap(float(radi[i]),total, 0.0, .80, -.70);3839 // Wave strength40 float wave = 10.0;4142 // Array of mouse positions (100) that intersect the plane43 vec3 mouse = positions[i].xyz;4445 // Caculate the distance for each intersection from the current46 // vertex position to the mouse intersection. Allowing us to create a sin47 // wave from a specific point.4849 float distanceToRipple =distance(position, mouse);5051 // What size is the ripple? Is the distance to the ripple52 // within the bounds of the width of the ripple, if so we53 // calculate the displacement of the y coordinate.5455 if (distanceToRipple < radiatingWidth) {5657 // Calculate the actual ripple or displacement58 float ripple = cos(sin(distanceToRipple * wave - time * velocity));5960 // we want to decrease the strength of the wave over time and therefore61 // the ripple strength62 wave -= decreaseRipple;6364 // Sum the ripples, all 100 of them. And decrease over time65 // to diseminate the ripple66 sum += ripple * decreaseRipple;6768 // When we get to 0 by decreasing the sum of ripples and69 // the strength of a ripple, we set to 0. So we add nothing70 // to the original position71 if (sum < 0.0) {72 sum =0.0;73 }74 if (wave < 0.0) {75 wave = 0.0;76 }77 }78 }79 }8081 // Add the overall displacement sum (tuning with a division)82 // to the Y of the current vertex position83 float y = position.y + sum/200.0;8485 // And finally the usual matrix multiplications86 vec4 modelView = modelViewMatrix * vec4( position.x, y, position.z, 1.0);87 gl_Position = projectionMatrix *modelView;
Integrate with a built in material - onBeforeCompile
So we can make as many shaders as possible but the people who created the built in shaders / materials have decades of knowledge and it is unlikely you can do better than them! 👀
This means we need to find away to integrate our custom shader code into a built in material.
Welcome .onBeforeCompile which is documented here. It says:

This is brilliant, it says:
Useful for the modification of built-in materials.!
So we can inject this code into a built in material 😍
So here is my setup:
1const OBC = useCallback((shader) => {2 console.log({ shader });3 // setShaderRef(shader);4 shader.uniforms = { ...shader.uniforms, ...customShader.uniforms };56 shader.vertexShader = shader.vertexShader.replace(7 "#define STANDARD",8 customShader.vertexShader.top9 );10 shader.vertexShader = shader.vertexShader.replace(11 `#include <fog_vertex>`,12 customShader.vertexShader.bottom13 );14}, []);1516const material = useMemo(() => {17 const m = new THREE.MeshStandardMaterial();18 m.onBeforeCompile = OBC; // Modifies the shader19 return m;20}, [OBC]);2122// jsx2324<mesh25 rotation={[0, 0, 0]}26 geometry={nodes.Plane002.geometry}27 material={materials["Material.001"]}28 onPointerMove={(e) => {29 if (position.length === 100) {30 position.unshift({31 origin: e.intersections[0].point,32 radius: 200.033 });34 }35 }}36>37 <primitive38 attach="material"39 object={material}40 {...materials["Material.001"]}41 />42</mesh>
This probably isnt an amazing setup but its one of the only ways I could get this to work.
First off We create an onBeforeCompile callback which will be called when we compile the shader.
And here we do string replacements with the builtin text and my custom shader.
How do you know what is in the orginal built in shader?
Well you can either search for the source code on sourceGraph or google the shaders behind the meshStandardMaterial.
Or a simpler way is to
1console.log(shader)
in onBeforeCompile and find a bit of string to replace.
Tbh I was probably alittle lazy as I just replaced the fog include, but you would probably want to replace something and then include the original string back in your shader.
And because I wanted my vertex code to be the last bit and not modified by anything I just plonked it at the end of the shader.
Update built in uniforms with useFrame
This bit I genuinely found the hardest, updating the uniforms every frame. I only figured it out using this spectrum chat.

I did it slightly different but I think the reason this works is we spread the new uniforms in onBeforeCompile and we then can basically update the original shader object uniforms which is referenced in the onBeforeCompile callback code.
Im not 100% sure on this so futher research would be required to give a definitive explanation.
Final Thoughts
This is a cool little project which show cases several things:
- How to do water ripple tails
- How to integrate custom shader code into a built in material
- How to automatically use hdri/hdr images with custom shader code
The key thing here I think needs further work is to update the gl_FragColor in the fragment shader by calculating the normals in real time based off the displacement.
Cool effect though!
Until next time 🙂

