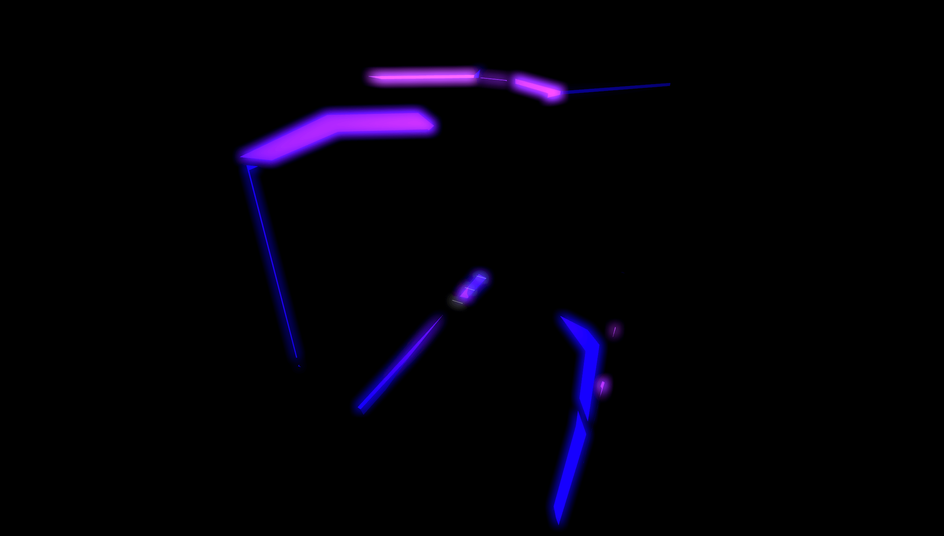
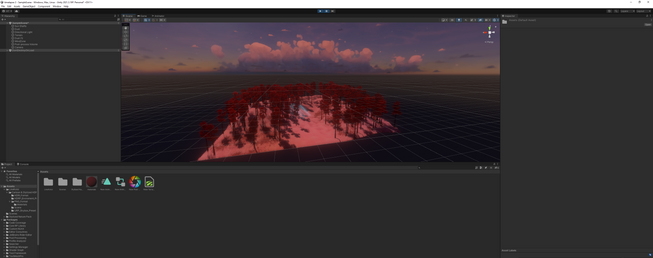
Im going to run through a tutorial which combines using blender to create a fractured cube and then uses bloom in a dark environment to give the effect the fractured parts of the cube are glowing.
Fracturing the cube
This is really really simple. Open up blender and create a cube mesh. Once we have the cube mesh we will install a free addon in blender - Cell Fracture.
Once this is installed you should see a cell fracture tab on the tool section which is located on a side tab in the main window.
With the cube selected, go ahead and enter edit mode and right click and subdivide a few times (5-6 should be enough).
Then finally we can select the cube and choose the type of cell fracture we want. This creates a mesh which is broken up in to fractured parts - in the name.
With this now complete we can export the mesh as a GLTF format model, which we can then use in our @react-three/fiber project.
The coding part
The code sandbox below is an extract from a website I built not long ago. Its a pretty cool spinning cube on the actual site and this one is static and has OrbitControls from @react-three/drei.
The only purpose of this is something to do as the scene loads, if you have a lot of data or hefty sized meshes then this is perfect. Low size and low usage of valuable resources used in 3D scenes.
1import { Suspense } from "react";2import FracturedCube from "./model/FracturedCube";3import { OrbitControls } from "@react-three/drei";4import styled from "styled-components";5import { Canvas as Can } from "@react-three/fiber";6import * as THREE from "three";78export const Canvas = styled(Can)`9 min-width: 100vw;10 min-height: 100vh;11`;12export const Scene = () => {13 return (14 <>15 <Canvas16 onCreated={({ gl, scene }) => {17 gl.outputEncoding = THREE.sRGBEncoding;18 gl.setSize(window.innerWidth, window.innerHeight);19 // black20 scene.background = new THREE.Color("#151515");21 }}22 camera={{ position: [16, 10, -8] }}23 >24 <gridHelper args={[10, 10]} />25 <Suspense fallback={null}>26 <color attach="background" args={["#2c2c2c"]} />27 <OrbitControls />28 <FracturedCube />29 </Suspense>30 </Canvas>31 </>32 );33};
We use styled components in this code sandbox or just one the Canvas component. This is a neat way to do it if you use styled components.
Few things to note which are worthy of comment. You can access the webgl context using the onCreated method on the Canvas component. This gives you access to gl, which in some other tutorials might be named renderer. We set the output encoding to be sRGB. Have a read up on color encoding, theres a few options depending on the scenario.
The renderer size is set to the width and height of the window, then we set the background color to be a light matt black color. The camera position is set using the camera property on the canvas, for ease as we don’t want to over complicate it.
1/*2Auto-generated by: https://github.com/pmndrs/gltfjsx3*/45import React, { useRef, forwardRef, useState } from "react";6import { useGLTF } from "@react-three/drei";7import { useThree } from "@react-three/fiber";8import FracturedGroup from "./FracturedGroup";9import { a } from "@react-spring/three";10import { EffectComposer, Bloom } from "@react-three/postprocessing";11import { KernelSize } from "postprocessing";1213const FracturedCube = ({ loadingProgress, ...props }) => {14 const mainGroup = useRef();15 const [hovered, setHovered] = useState(false);16 const { size } = useThree();17 const { nodes } = useGLTF("/cell-fracture-cube-1.2.glb");18192021 return (22 <group {...props} dispose={null}>23 <pointLight position={[0, 0, 0]} intensity={100} color={[0, 0, 0.1]} />24 <EffectComposer>25 <Bloom26 intensity={3.9} // The bloom intensity.27 width={size.width} // render width28 height={size.height} // render height29 kernelSize={KernelSize.VERY_LARGE} // blur kernel size30 luminanceThreshold={0.005} // luminance threshold. Raise this value to mask out darker elements in the scene.31 luminanceSmoothing={0.15} // smoothness of the luminance threshold. Range is [0, 1]32 />33 </EffectComposer>3435 <a.group36 ref={mainGroup}37 onPointerOver={() => setHovered(true)}38 onPointerLeave={() => setHovered(false)}39 >40 {Object.keys(nodes).map((name, groupIndex) => {41 const node = nodes[name];42 const { x, y, z } = node?.position || {};4344 return (45 node.isGroup && (46 <FracturedGroup47 key={`${x}-${y}-${z}`}48 group={node}49 loadingProgress={loadingProgress}50 />51 )52 );53 })}54 </a.group>55 </group>56 );57};5859export default FracturedCube;
In the above code, this was originally generated by gltftojsx npm package with the npx commands. It has been heavily modified though.
We grab the mesh nodes from the glb file when loaded in and use this to loop over every group node, with a simple check to see if its a group.
And finally we pass the group node down to the child component which is where the interesting animation occurs.
1import { useRef, useState, useEffect } from "react";2import { useSpring } from "@react-spring/core";3import { a } from "@react-spring/three";4import FracturedMesh from "./FracturedItem";56const FracturedGroup = ({ group, loadingProgress }) => {7 const meshRef = useRef();8 const [hovered, setHovered] = useState(false);9 const { pos } = useSpring({10 pos: hovered11 ? [group.position.x * 1.1, group.position.y * 1.1, group.position.z * 1.1]12 : [group.position.x, group.position.y, group.position.z],13 config: { mass: 0.1, friction: 0, duration: 200, clamp: false }14 });1516 // useEffect(() => {17 // setInterval(() => {}, 3000);18 // }, []);1920 // useEffect(() => {21 // const interval = setInterval(() => {22 // const random = Math.random();23 // if (random > 0.82) {24 // setHovered((old) => !old);25 // }26 // }, 3000);27 // return () => clearInterval(interval);28 // }, []);2930 return (31 <a.group32 ref={meshRef}33 position={pos}34 scale={group.scale}35 onPointerMove={() => {36 console.log(true);37 setHovered(true);38 }}39 onPointerOut={() => {40 setHovered(false);41 }}42 >43 {group.children.map((mesh, meshId) => (44 <FracturedMesh45 key={meshId}46 mesh={mesh}47 material={mesh.material}48 loadingProgress={loadingProgress}49 />50 ))}51 </a.group>52 );53};5455export default FracturedGroup;
The crux of this effect is using @react-spring.
1const { pos } = useSpring({2 pos: hovered3 ? [group.position.x * 1.1, group.position.y * 1.1, group.position.z * 1.1]4 : [group.position.x, group.position.y, group.position.z],5 config: { mass: 0.1, friction: 0, duration: 200, clamp: false }6});
A few things going on here, the trigger for the effect is on hover, and we set the hovered state which acts like a switch on/off. So when we hover we active this spring, we multiply the positional component by 1.1. So in effect scaling the positions outwards. And then when we don’t hover we go back to the original positions. With all the positional data coming from the group node we passed down.
The pos is defined inside the spring along with settings to enable a smooth transition, we can add some real world forces to the fracture groups. The pos is then destructured out of the spring and can be used on/in a position attribute defined on the group just below.
1import { useFrame } from "@react-three/fiber";2import { useRef, useState } from "react";34const FracturedMesh = ({ mesh, material = {}, loadingProgress }) => {5 const meshRef = useRef();67 return (8 <mesh ref={meshRef} geometry={mesh.geometry}>9 <meshPhysicalMaterial10 attach="material"11 roughness={0}12 metalness={0}13 clearcoat={1}14 emissiveIntensity={0}15 />16 </mesh>17 );18};1920export default FracturedMesh;
The final and last part of the puzzle is the actual definition of the mesh and use of meshPhysicalMaterial. And thats a wrap for the rendering of the cube part.
Postprocessing and bloom
For postprocessing there are two packaged which I used, the postprocessing and the @react-three/postprocessing packages. Postprocessing was originally used with plain threejs and then someone ported them over to allow for use in @react-three/fiber and the @react-three/postprocessing package was born.
The setup for the postprocessing was pretty standard and you can have a pretty low threshold before the effect takes effect and then crank up the intensity abit. The kernelSize will influence how much bloom you get, not 100% sure on this setting but have a play around with it!
1<EffectComposer>2 <Bloom3 intensity={3.9} // The bloom intensity.4 width={size.width} // render width5 height={size.height} // render height6 kernelSize={KernelSize.VERY_LARGE} // blur kernel size7 luminanceThreshold={0.005} // luminance threshold. Raise this value to mask out darker elements in the scene.8 luminanceSmoothing={0.15} // smoothness of the luminance threshold. Range is [0, 1]9 />10</EffectComposer>
The website where I used it
The website which I build was rick3d.com.
And if you go to rick3d.com/3d-world you will see the loader for the scene.
I originally wanted to use godrays from a mesh inside of the cube but I genuinely couldn’t get the @react-three/postprocessing and Godrays effect to work and gave up on that idea. Bloom was the final effect I chose and looks pretty good!


